Home
Epoxyboard Anatomy
Water in Board
Repairs - Menu
Disasters
Assorted Repairs
Miscellany
Ancient History
Donate
Contact
Legal Stuff

Vacuum-bagging

Wide-spread myths notwithstanding, vacuum-bagging is not rocket science. It is the simple expedient of removing ambient air, so as to let atmospheric pressure aid in the forming/laminating/drying/clamping of a work piece.

This removing of air can be accomplished with a vacuum-pump, or a venturi vacuum-generator driven by a compressor (I built two boats with one of those), or in a pinch, a vacuum-cleaner (this will most likely burn out in short order, though, since a vacuum cleaner depends on air flow to cool its motor).

The vacuum bag can consist of fancy vacuum film, or any other plastic film, provided it does not have holes in it. The sealing of said plastic can be achieved with official vacuum-bagging tape, or mastix, or the doughy substance intended to paste posters to walls.

Whichever way you create the vacuum, you need a means of adjusting it, so as not to crush your workpiece. This adjustment can come from a valve, or some other controlled leak.

For myself, I would never vacuum-bag anything without the benefit of a vacuum gage, lest I implode a board, or squeeze too much resin from the reinforcements.

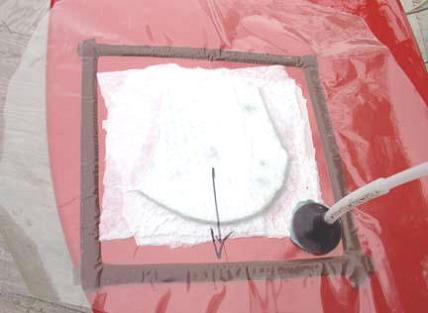
To achieve even pressure throughout the bagged area, some non-collapsing substance needs to be introduced that prevents the vacuum film from sealing itself against the bagged material. Breather fabric is what the pros use, but a piece of string draped over the area will do almost as good.

Lest this breathing device get glued to the bagged material, some means of release needs to be added. The proper stuff is a nylon-based fabric called peel ply. A Nylon taffeta from the fabric store will do as well.

Let's put it all together!

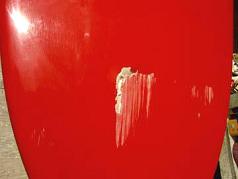
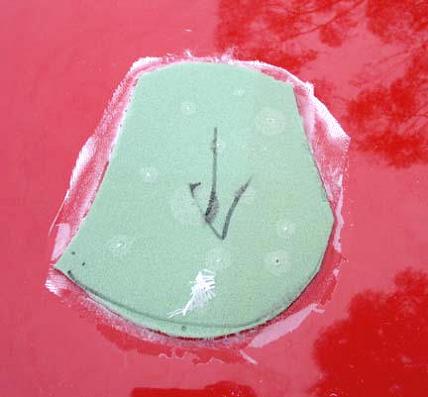
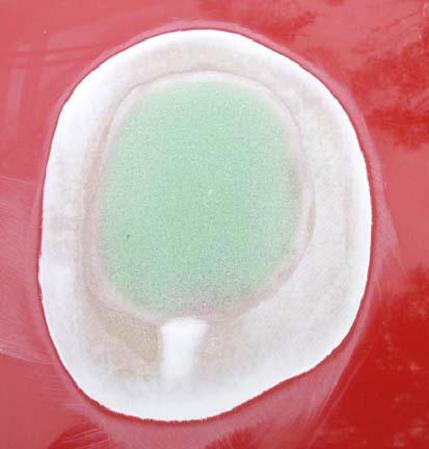
A Surftech Tuflite just came in with a deep gouge in the bottom:

deep gouge into the EPS foam Divinycell beveled gouge in EPS foam filled
Successful vacuum-bagging is a matter of preparation: before mixing the resin that will hold it all together, cut all the materials and stack them in the order they will be applied; tape off the area with vacuum-tape; cut the vacuum-film, cut the pick-up hole and mark it; cut the breather fabric, cut the peel ply, stack all in the order they will be needed. Lay out the tools needed to assemble the job. Turn on the vacuum-pump, dial in the proper vacuum-level and run a hose to the repair site. Turn on the answering machine

Then, and only then, do I go ahead and mix the resin, applying it as I would for a normal lamination.

After stacking material, peel ply, breather and vacuum film, peel away the protective strips on the vacuum tape, smooth the film into the tape with as few wrinkles as possible, apply the vacuum, chasing little leaks with your thumb until

it starts to draw down. Small leaks whistle and are relatively easily located.

Hover for a while until things settle in, then adjust the vacuum to a good level for the particular job - 7 or 8inHg for a patch like this, more would squeeze too much resin out of the fiberglass.

As a guide to the cure time, I apply a dab of the resin I used onto a stand adjacent. Once that dab of resin is hard, I know it is safe to remove the vacuum.

Once the disposables have been removed (vacuum tape, film, breather and peel ply), the raw patch emerges, kind-a messy looking, with the inner glass peeking out around the edges.
Grind it all down, though, with the 7" sander, and a beautifully beveled patch develops. All edges are feathered out, and no hard spot will later cause troublesome discontinuities.

Proceed to outer laminations etc just like a basic "normal" repair.

want to see how it all turned out? click here

or check here for my vacuum system set-up click here

back to Repair Menu