|
| |
 |
 |
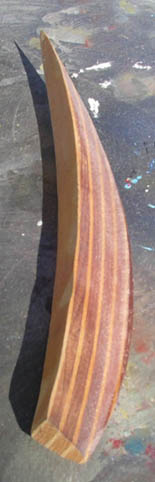
| Nose & Tail
Blocks in veneer boards These are end
bumpers, designed to protect the tender EPS cores from the elements.
Laminated mostly from California Redwood and Pine, these solid chunks of
lumber are soft enough to be able and deform on impact, thusly absorbing
energy and confining damage to the tip of the board, instead of
involving the more brittle fiberglass and veneer further aft. While not
foolproof, this arrangement is generally capable of protecting boards
that are run into rocks, or dropped from cars (while parked, NOT while
going down the freeway at 75mph, Martin!).
To affect a repair, one must first closely
inspect the damage, to see if it is indeed confined to the lumber block,
or if it involves in any way at all the rest of the board: if in the
lumber only, one best uses Polyester resin; if, however, there is the
slightest hint of a possibility that a crack into the adjacent EPS
exists, then the repair MUST USE EPOXY AND EPOXY ONLY!! |
|
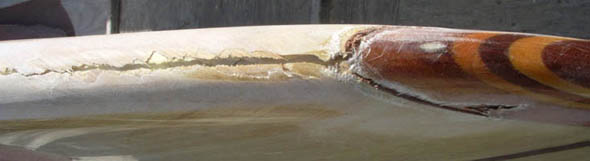
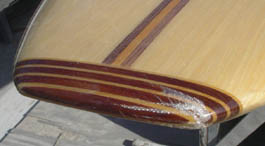
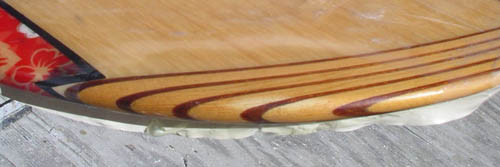
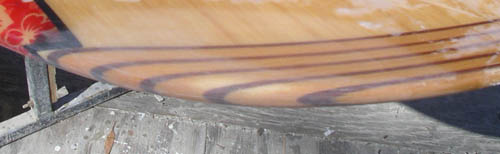
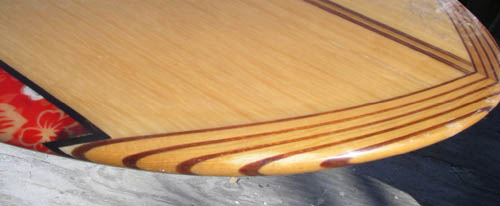
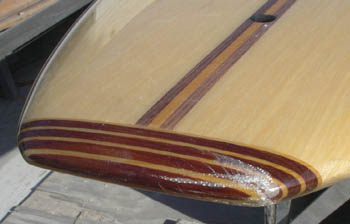
| The nose up
above obviously has suffered much beyond the nose block, so must use Epoxy.
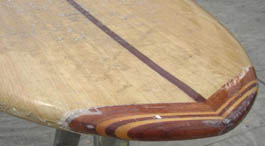
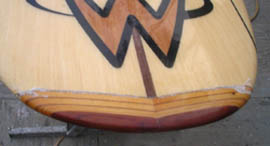
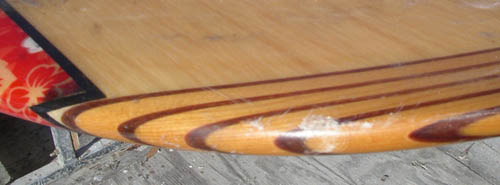
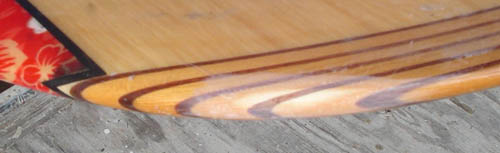
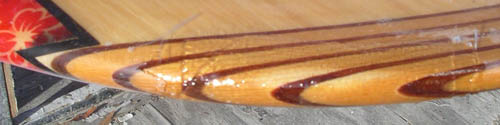
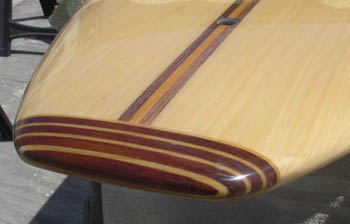
The two next ones below also involve the EPS and must use Epoxy. The one
below and to the right is confined to the lumber block and can use Polyester |
   |
|
must use Epoxy
must use Epoxy
can use Polyester |
| So why don't I
just play it safe and use Epoxy in all cases? Because, unfortunately, most
Epoxies significantly darken the Redwood, while Polyester pretty much
replicates the original coloring. Ok - if the
damage is extensive and involves cracks into the EPS core, then the repair
must proceed with Epoxy resin, Redwood discoloration or no. If, however, the
crack is confined to the lumber, we could just leave it be and go surfing.
Or we could get fussy and try to repair it so no-one can tell that we
dropped the board in the garage :) |
 |
Typical minor impact to
nose block. The fiberglass covering the block (lapping onto the body of the
board approx 2in) has shattered and delaminated, turning it white. |
 |
To make the repair last, it
must be placed onto solid material. To make it look good, it ought to be
clear. Therefore, all loose, cracked fiberglass needs to be removed. |
 |
(2) layers of 4oz glass are
applied over the bare area, well wetted out with Polyester sanding resin. |
 |
Once cured (I use UV-cure
for this application, so cure is a minute or two away), sand and shape the
fiberglass, so it feathers out smoothly onto the original glass. To make
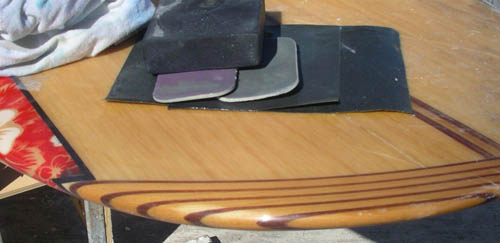
sure it is fair (i.e. has no lumps or bumps), I NEVER sand without a sanding
block of sorts - for a curvaceous shape such as this, a semi-soft rubber
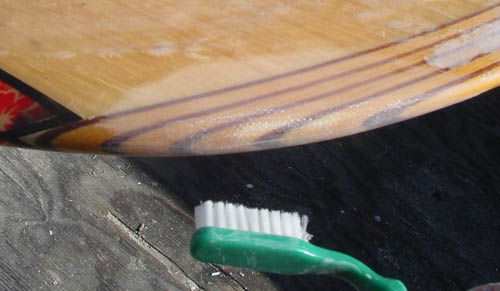
block is ideal. Blow off the sanding debris and get out a retired
toothbrush, in order to brush the last little dust bunnies out of the glass
texture - these would show up as white spots and can truly ruin your day!! |
 |
Then flow on finish resin
(or sanding resin if you don't want to buy yet another can of stuff you will
need only a teaspoon of) Notice the tape "rain
gutter" beneath, to prevent resin running all over the bottom. |
 |
The final resin coat is
sanded around its perimeter, to make for a smooth transition from old to
new, then generally sanded to 220 grit dry paper. |
 |
Again using the sanding
block, the area is then sanded with successively finer wet and dry paper. I
use 400, 600, 1200 and 2000.
Use much water, particularly with the finer grits, to
eliminate scratching. |
 |
Time for the polish! I use
a fairly coarse polish to start, then finish off with a much finer "swirl
remover".
You can do this by hand if need be, but there is no
substitute for a decent polisher to bring out the shine! |
 |
All done! |
| You will notice
in the above example, that the repair is a bit lighter than the rest of the
wood. All the fussing and polishing cannot compensate for the natural
darkening of the wood that starts the moment a board leaves its shipping
box. When we sand away the surface coat, we set the darkening clock back to
zero - eventually, though, our repair will catch up with the rest of the
lumber. Only in a brand-new board, such as the freight-damaged one below,
can we expect to achieve a perfect color match in the repair. (notice also
how I took liberties with the shape, to get rid of the worst splintering) |
 |
 |
|
return to Repair Menu |
|