|
Vacuum
bagging, as well as vacuum drying, are invaluable tools in the shop
Just as
with any other tool, however, injudicious use of this invaluable tool,
can create more harm than good
(beyond
just having to do a job over, I utterly, totally destroyed a custom
board once with overzealous application of a vacuum - so beware!) |
|
Vacuum Pressure Guidelines for Vacuum Bagging
Pressures need to be appropriate for the type of board at hand, as well
as the pending operation: a new, curvaceous wave board, built like the
proverbial brick outhouse, can safely be subjected to much higher vacuum
levels than a beat-up, lightly built Formula board with huge flat
expanses.
As well, the vacuum pressure needed to bag some PVC sheet foam, would
squeeze too much resin out of the stack if used on straight
reinforcements.
So - in lieu of hard-and-fast numbers which really don't exist - below
the ranges that have worked for me (most of the time, with a few very
embarrassing exceptions...)
all the following inHg (inches of mercury)
Compact straight Carbon/Kevlar laminations (no sheet goods) 2-3"
Bag PVC sheet foam where EPS is exposed 3-6"
Bag PVC sheet foam or veneer where the inner structure is intact 5-7"
|
 |
|
Vacuum level guidelines for water evacuation
General
vacuum range 3-10"
But do exercise caution: the lighter the board, the less it can
generally handle without distortion; throttle back on hot days, since
some of our ingredients are thermoplastic; proceed with great caution if
the board is fatigued, with soft spots on deck - I start those at 3" or
so, to just hear the gurgle, then increase slowly, allthewhile watching
the soft spots like a hawk. The moment there is any distortion, back
off!
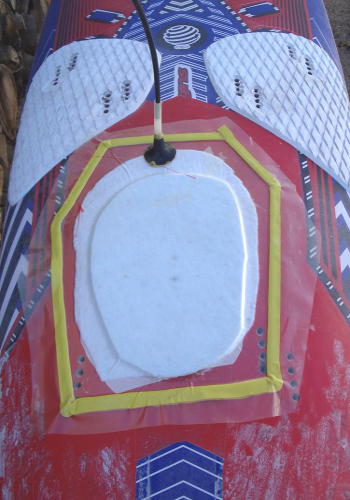
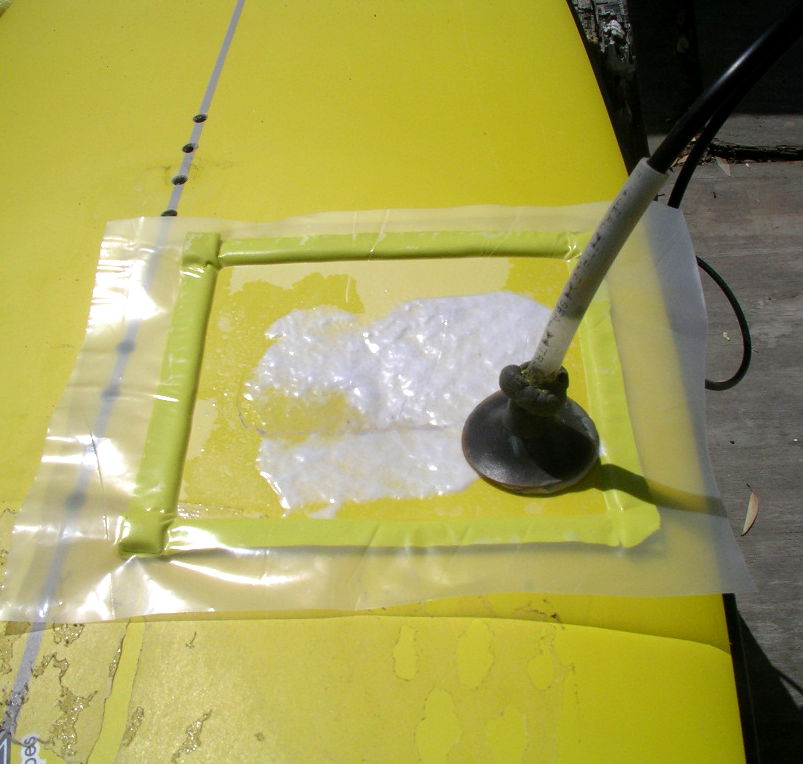
The Procedure
When
first applying the vacuum to the core of an EPS board, it will vaporize
the water within, mobilizing it, initiating a general movement of water
molecules from the higher to the lower-pressure area. You can see
(hopefully) some drops of water emerge at the pick-up. Once a balance of
pressures has been achieved, after approx 8 to 10 mins with the typical
1#/cuft core, there will be gurgling and assorted noises from the core,
but little if any water emerging at the pick-up. Remove the pick-up
then, and let things rest, to allow the moisture within to find a new
balance. After about an hour on a warm day, apply another 8 or so
minutes of vacuum at the pickup. The cycle repeats, just with a drier
starting point. And so on and so forth. If the water is salty, and has
been in there for weeks, it may well take weeks to get it out,
sometimes, even months.
Eventually, at some point in the procedure, one can hear a gurgle
emanating from the core, but nothing comes out any more. THEN is the
point to drill a little hole opposite the evacuation point, and draw
nice, warm, hygroscopic air through it, which will then carry the last
vestiges of moisture out with it. This works best when things are warm.
As well, I have experimented with first pulling this air through drying
agents (really exotic stuff such as roasted rice kernels), in order to
increase the air's "cargo capacity".
Either way, the aim is to dry it until, with the vent closed, and the
vacuum pulling, one cannot hear any gurgle within when putting one's ear
to the board's skin
|
|
think CHOCOLATE as you
vacuum-dry a board: it was Henri Nestlé of Nestlé Chocolate
fame, who invented the process of vacuum-drying foods in 1866 |
|