|
Repairs - the Basics
To repair a small surface ding, all you really need to know is
where to buy Ding Stick and to apply it on a falling thermometer. For basic
considerations, see notes on Field Repairs
To repair a more severe problem, however, you need to
understand the properties of your repair materials and their limitations;
how a board is put together (see "anatomy"), and
that a board is a flexible structure where discontinuities will cause problems.
The goal with any repair must be to restore the structure
to its original strength, and to do so without creating "hard spots". Such hard
spots would cause stress risers that could quickly lead to new problems
immediately adjacent to your repair. Picture two lengths of 2x2 glued together
with an overlap. When loaded, the assembly will fail at the end of either or
both pieces of lumber, since an abrupt change of stiffness there causes a severe
stress riser. Put the same lengths of 2x2 together with a long scarf joint, load
it, and watch it fail somewhere totally unrelated to the joint.
Adding lots and lots of fiberglass over a ding "for good
measure", or filling a hard-edged hole with an unyielding substance, will cause
just such a stress riser at the perimeter of a repair. If this repair is in a
structurally significant area of the board, such as the middle third near the
rails, or near fixtures, then such a stress riser can lead to failure later - at
best, cracking along the edge that will leak; at worst a snap.
Always rebuild with like materials, and keep those joints
well staggered!
If you have never worked with fiberglass before, here a
quick intro, "Fiberglass 101"
And pay attention to fiber
orientation, lest your repair is unable to take a load!
You could probably build a whole board with a razor-blade
and some tape, but it surely helps matters along to have a few real tools, such
as sanders, grinders, saws, routers, and a few other odds and ends.
Click here for my basic assortment.
'nuf said! You familiarized yourself with the materials
on the materials page, right? let's get on with it, then!
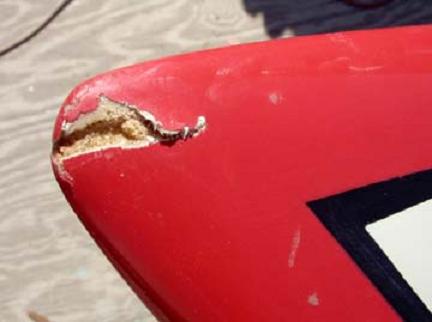
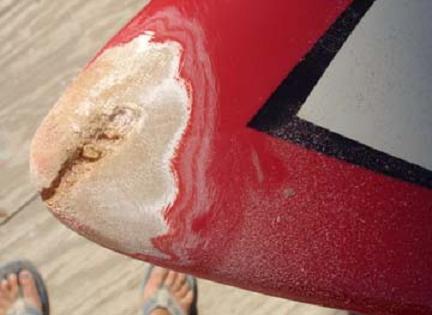
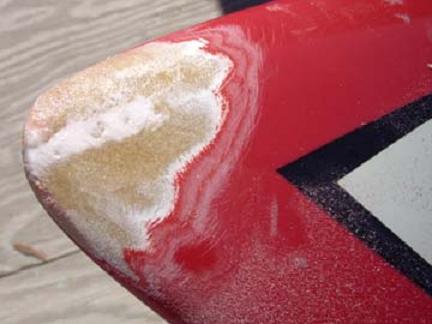
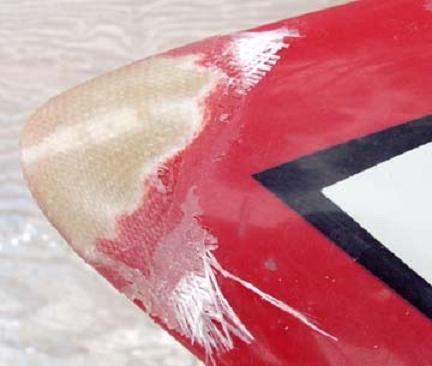
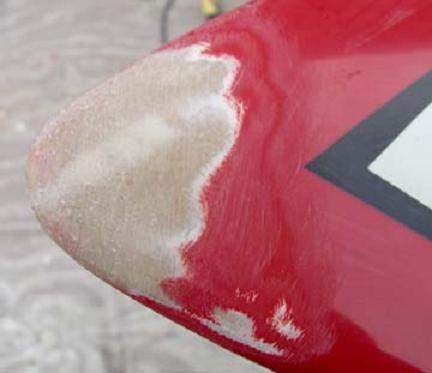
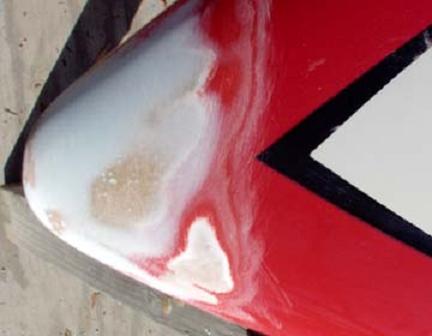
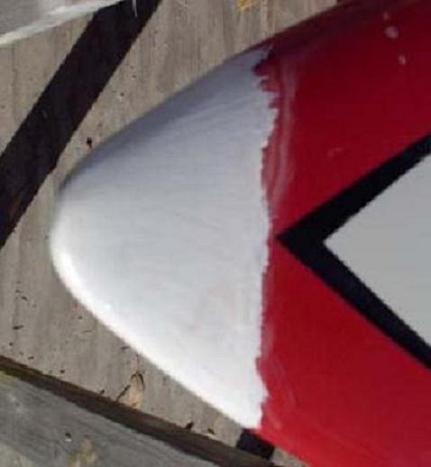
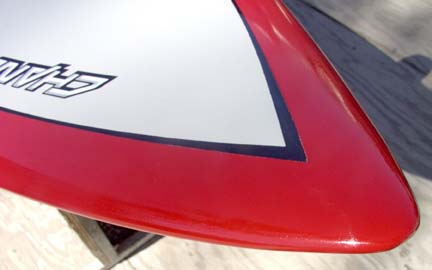
This Surftech Channel Islands ran into a fin in front of him. The
nick leaks slightly, but reads nearly dry with the moisture meter. This is what
I did:
|